Install Zabbix Server
First, make sure that all of the latest patches are installed.
sudo apt-get update
sudo apt-get dist-upgrade
sudo reboot
Configure Firewall:
sudo ufw allow ssh
sudo ufw allow http
sudo ufw allow 10051/tcp
sudo ufw enable
- Download and extract the source.
cd /tmp

sudo groupadd zabbix
sudo useradd -g zabbix zabbix

sudo mkdir /opt/zabbix
sudo chown zabbix:zabbix /opt/zabbix

wget https://superb-sea2.dl.sourceforge.net/project/zabbix/ZABBIX%20Latest%20Stable/3.2.3/zabbix-3.2.3.tar.gz

tar zxvf zabbix-3.2.3.tar.gz
- Install and create the database:
sudo apt-get -y install postgresql postgresql-contrib

sudo -u postgres psql
\password postgres
\q

sudo -u postgres createuser -D -A -P zabbix
sudo -u postgres createdb -O zabbix zabbix

cd /tmp/zabbix-3.2.3/database/postgresql/
sudo -u zabbix psql -U zabbix zabbix < schema.sql
sudo -u zabbix psql -U zabbix zabbix < images.sql
sudo -u zabbix psql -U zabbix zabbix < data.sql

sudo cp /etc/postgresql/9.5/main/pg_hba.conf /tmp/pg_hba.conf
sudo chmod 777 /tmp/pg_hba.conf
cat >> /tmp/pg_hba.conf << EOF
host  zabbix  zabbix  127.0.0.1  255.255.255.255  trust
EOF
sudo chmod 640 pg_hba.conf
sudo cp /tmp/pg_hba.conf /etc/postgresql/9.5/main/pg_hba.conf
sudo systemctl restart postgresql
- Compile and Install Server:
sudo apt-get -y install build-essential libpq-dev libxml2-dev snmp snmp-mibs-downloader \
    libsnmp-dev libssh2-1-dev libopenipmi-dev libcurl4-openssl-dev

cd /tmp/zabbix-3.2.3/

./configure --prefix=/opt/zabbix --enable-server --with-postgresql --with-ssh2 \
            --enable-agent --enable-ipv6 --with-net-snmp --with-libcurl \
            --with-libxml2 --with-openipmi --with-openssl
make

sudo make install
- Configure the database configuration:
sudo sed -i 's/# DBPassword=/DBPassword=PASSWORD/g' /opt/zabbix/etc/zabbix_server.conf
sudo sed -i 's/# DBPort=3306/DBPort=5432/g' /opt/zabbix/etc/zabbix_server.conf
sudo sed -i 's/LogFile=\/tmp\/zabbix_server.log/LogFile=\/var\/log\/zabbix_server.log/g' /opt/zabbix/etc/zabbix_server.conf
sudo sed -i 's/# LogFileSize=1/LogFileSize=512/g' /opt/zabbix/etc/zabbix_server.conf
- Configure and start Zabbix Server
cat > /tmp/zabbix-server.service << EOF
[Unit]
Description=Zabbix Server
After=syslog.target network.target

[Service]
Type=oneshot
ExecStart=/opt/zabbix/sbin/zabbix_server -c /opt/zabbix/etc/zabbix_server.conf
ExecReload=/opt/zabbix/sbin/zabbix_server -R config_cache_reload
RemainAfterExit=yes
PIDFile=/tmp/zabbix_server.pid

[Install]
WantedBy=multi-user.target
EOF

sudo mv /tmp/zabbix-server.service /etc/systemd/system/

sudo touch /var/log/zabbix_server.log
sudo chown zabbix:zabbix /var/log/zabbix_server.log

sudo systemctl enable zabbix-server
sudo systemctl start zabbix-server
- Update the web server configuration:
sudo sed -i 's/post_max_size = 8M/post_max_size = 16M/g' /etc/php/7.0/fpm/php.ini
sudo sed -i 's/max_execution_time = 30/max_execution_time = 300/g' /etc/php/7.0/fpm/php.ini
sudo sed -i 's/max_input_time = 60/max_input_time = 300/g' /etc/php/7.0/fpm/php.ini

sudo apt-get -y install php-pgsql php-bcmath php-mbstring php-gd php-xml

sudo systemctl restart php7.0-fpm

cd /tmp/zabbix-3.2.3/frontends/php
sudo mkdir -p /opt/zabbix/frontend
sudo cp -R * /opt/zabbix/frontend/

cat > /tmp/zabbix << EOF
server {
  listen 80;
  listen [::]:80;

  root /opt/zabbix/frontend;

  location / {
    index index.php;
    error_page 403 404 502 503 504  /index.php;
    try_files \$uri \$uri/ index.php;
  }

  location ~ \.php\$ {
    include fastcgi_params;
    fastcgi_pass unix:/run/php/php7.0-fpm.sock;
    fastcgi_split_path_info ^(.+\.php)(/.+)$;
    fastcgi_param SCRIPT_FILENAME \$document_root\$fastcgi_script_name;
    fastcgi_param PATH_INFO \$uri;  # necessary for URL rewrite
    fastcgi_index index.php;
  }

  location ~ \.(jpg|jpeg|gif|png|ico)$ {
    access_log      off;
    expires         60d;
  }
}
EOF

sudo mv /tmp/zabbix /etc/nginx/sites-available/
sudo ln -s /etc/nginx/sites-available/zabbix /etc/nginx/sites-enabled/zabbix

sudo chgrp -R www-data /opt/zabbix/frontend/conf
sudo chmod -R g+w /opt/zabbix/frontend/conf

sudo systemctl restart nginx
- Navigate to the Zabbix frontend which should resemble http://fqdn. Default username/password is admin/zabbix.
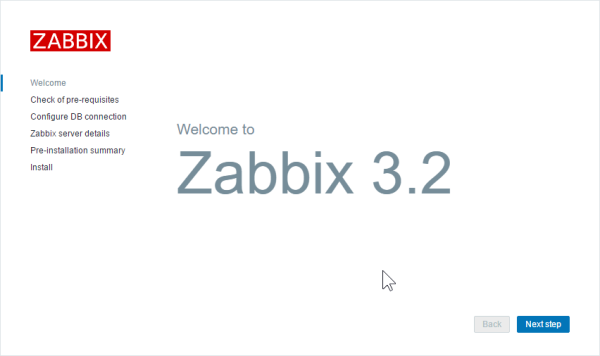
Configure the Zabbix Front End
- At the welcome screen, Click
Next Step.
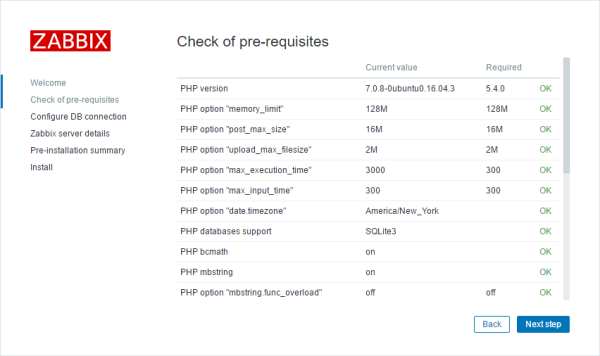
- All of the pre-requisites should pass… Click
Next Step.
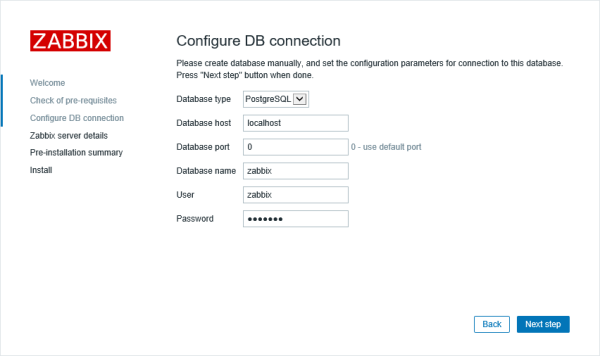
- Select SQLite3 for the database type, and type
/opt/zabbix/db/zabbix.db. ClickNext Step.
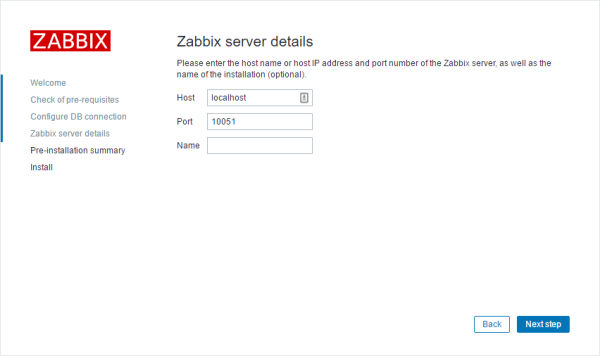
- For the server details, accept the defaults and click
Next Step.
- On the summary screen, click
Next Step.

- Click
Finishand then you can log in.

Use Zabbix
You will need to add agents for Zabbix to monitor. The Zabbix website contains great documentation to getting started setting up users, hosts, and triggers.