Install SQL Server 2016 Always-On Cluster
I a big believer in SQL Server's Always-On technology. With storage being cheap, and the fast fail-over of an Always-On server, there is no reason to use the older clustering technology that required shared storage and could take up to 30 seconds in my experience to start the SQL Database Engine and complete the fail-over. With Always-On, there is also the ability to do “geo” based replication and fail-over. Geo-Replication enables you to configure readable secondary databases in the same or different data center locations. Secondary databases are available for querying and for fail-over in the case of a data center outage or the inability to connect to the primary database.
Here is how I set-up SQL Server 2016 Always-On Clusters. For these examples I'll use the following assumptions:
- Active Directory Domain: contoso.com
- SQL Server Node 1: SQLAO1N1
- SQL Server Node 2: SQLAO1N2
- SQL Cluster Name: SQLAO1
- Group Managed Service Account: svc-sqlao1
The first step is to install Install Windows Server 2012 R2 on both nodes. I also add two additional disks: one for data and one for logs. I also format them with 64K allocation units which I think gives SQL better performance:
$disks = @(
    $(Get-Disk -Number 1),
    $(Get-Disk -Number 2)
)

foreach ($disk in $disks) {
    Set-Disk -Number $disk.Number -IsOffline $false
    Set-Disk -Number $disk.Number -IsReadOnly $false

    Initialize-Disk -Number $disk.Number -PartitionStyle GPT
    New-Partition -DiskNumber $disk.Number -UseMaximumSize -GptType '{ebd0a0a2-b9e5-4433-87c0-68b6b72699c7}' -AssignDriveLetter

    $partition = (Get-Partition -DiskNumber $disk.Number | Sort-Object Size -Descending | Select-Object -First 1)

    Format-Volume -FileSystem NTFS -Partition $partition -AllocationUnitSize 65536 -Confirm:$false
}
The next step is to create an Active Directory Group for DBAs and the Group Managed Service Accounts for the SQL Engine to use. On the Domain Controller or a system with a remote server administrative tools (RSAT) installed:
Import-Module ActiveDirectory

New-ADGroup -Name SQLAO1DBA -GroupCategory Security -GroupScope Global

New-ADServiceAccount -Name svc-sqlao1 -Enable $true -DNSHostName sqlao1.contoso.com

New-ADGroup -Name SQLAO1Nodes -GroupCategory Security -GroupScope Global
Add-ADGroupMember SQLAO1Nodes SQLAO1N1$,SQLAO1N2$

Set-ADServiceAccount -Identity svc-sqlao1 -PrincipalsAllowedToRetrieveManagedPassword SQLAO1Nodes
Then, reboot each node and then execute the following on each node:
Add-WindowsFeature RSAT-AD-PowerShell
Import-Module ActiveDirectory

Install-ADServiceAccount -Identity svc-sqlao1
Now the account is available on each node.
- Mount the SQL 2016 Installation ISO.
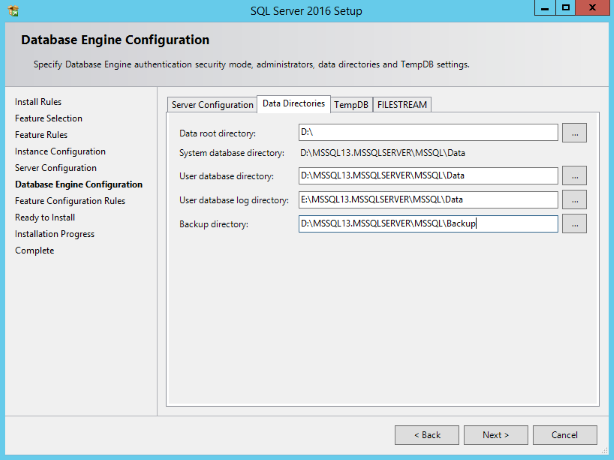
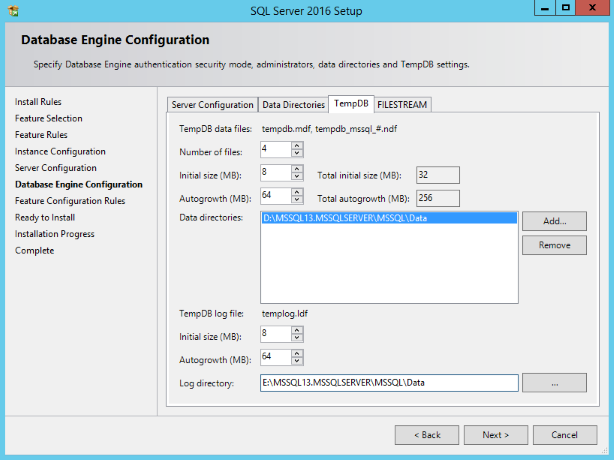
- Next, choose the authentication option. I choose Windows, since I set most application up to use integrated authentication but have on occasion set up Mixed Mode authentication if an application couldn't work with integrated authentication, I also add the DBA group created above to manage the node. I never add individual accounts to the SQL Server Administrators. Click on the Data Directories tab.

While SQL is being installed on the first node, repeat this on the other node to get it ready.
Fail-Over Clustering
Once both nodes are up and running and have SQL Server installed, it is time to install Fail-Over Clustering. Open an elevated PowerShell session on each node:
Install-WindowsFeature -Name Failover-Clustering -IncludeManagementTools

Test-Cluster -Node SQLAO1N1,SQLAO1N2
You may get warnings regarding one network interface or no shared disk but these are ok as the Fail-over is only managing a shared IP address for the listener. On one of the nodes, execute the following in an elevated PowerShell session:
New-Cluster -Name SQLAO1 -Node SQLAO1N1,SQLAO1N2 -StaticAddress 172.16.101.81 -NoStorage
I usually set up Cluster-Aware Updating at this point so that I can apply updates easily, but I'll put the directions in another page since it is pretty much the same on all types of Windows clusters.
Availability Group Preparation
Always-On needs a place to store the database during the initial replication. I typically create a folder D:\Backups drive for backups and the initial replication. Share this folder and give the SQL gMSA account permission to Modify, Read & execute. Then:
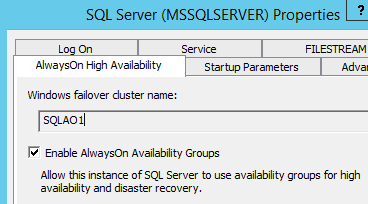
- On each node, open SQL Server Configuration Manager and locate the SQL Server service. Open the properties and click on the AlwaysOn High Availability. Check the
Enable AlwaysOn Availability Groupsand make sure that the Windows fail-over cluster name is correct.
- Restart the SQL Service on both nodes.
Availability Group Configuration
- Open SQL Server Management Studio. In the Connect To Server window, ensure that SQLAO1N1 is listed, and use Windows Authentication to log in. Click Connect.
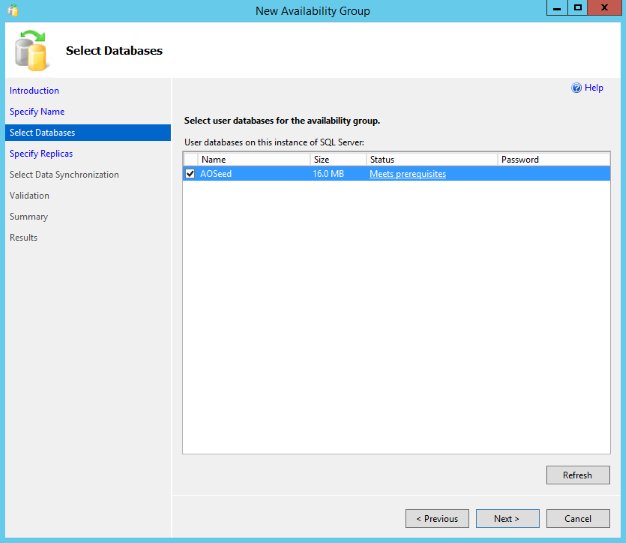
- Create a Database named AOSeed. This database will be used to set-up the availability group.
- Preform a full backup prior to proceeding.
- In the left pane, expand Always-On High Availability.
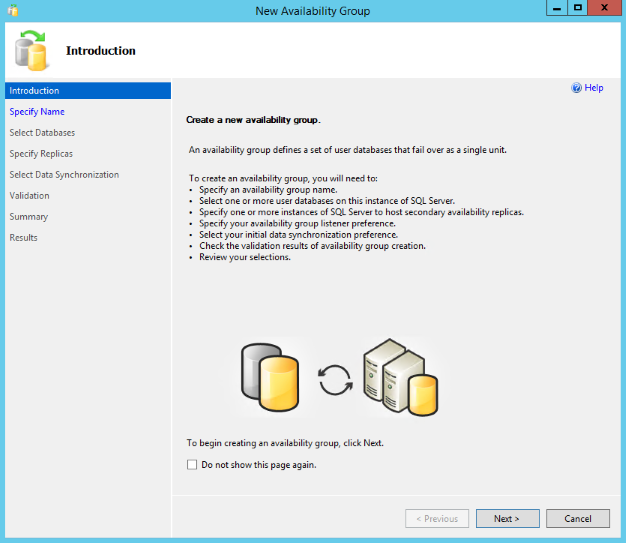
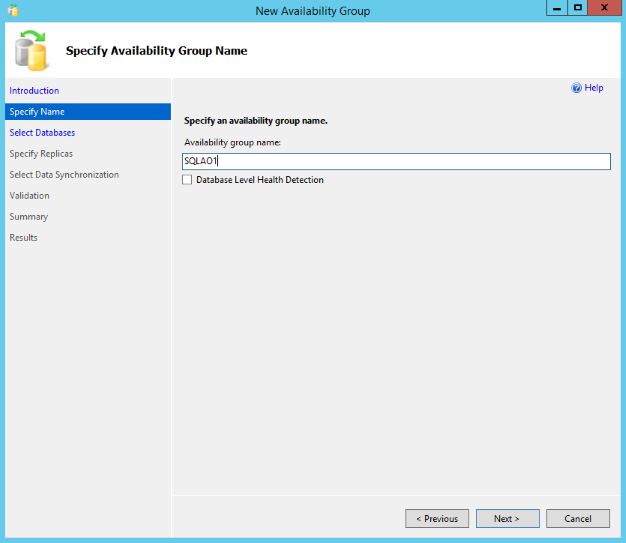
- Right-click Availability Groups, and select New Availability Group Wizard.
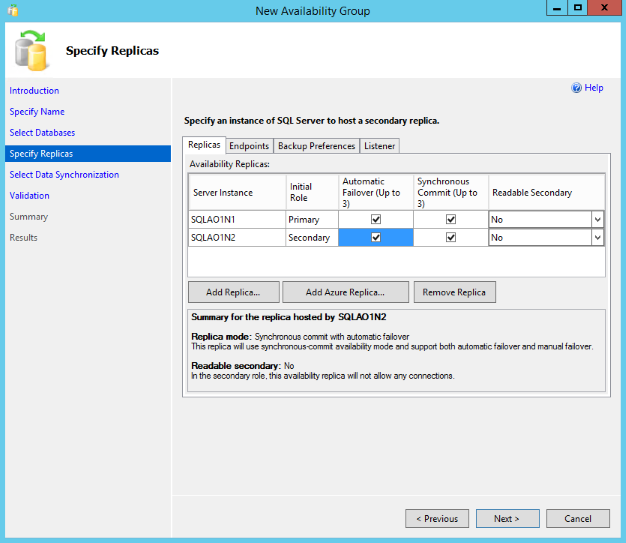
- On the Specify Replicas page, click Add Replica. In the Connect To Server window, enter SQLAO1N2 next to Server Name, and click Connect.
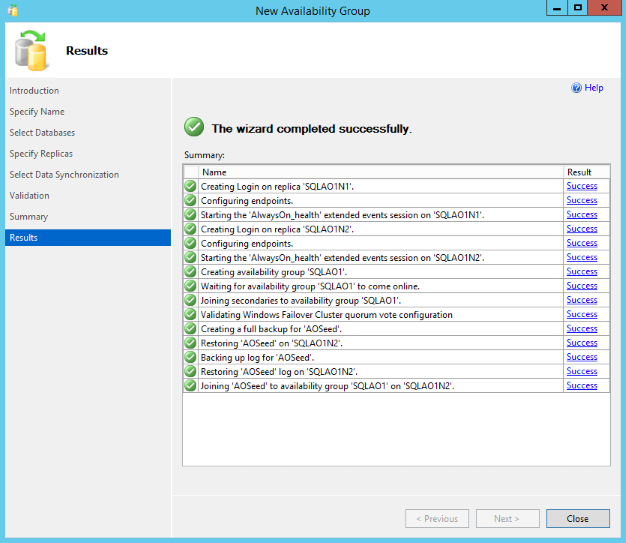
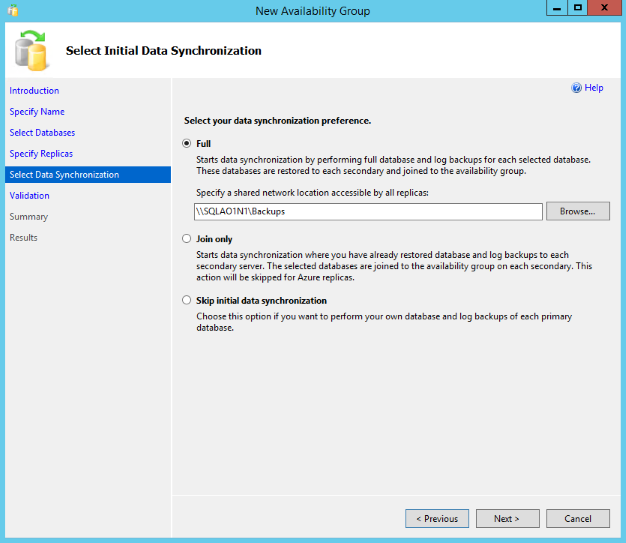
- On the Select Initial Data Synchronization page, select Full. The wizard subsequently triggers a full backup of the database, logs to a location you specify, and restores this backup to the secondary SQL Server instance, in this case, SQLAO1N2. From there, replication begins synchronously between SQLAO1N1 and SQLAO1N2.
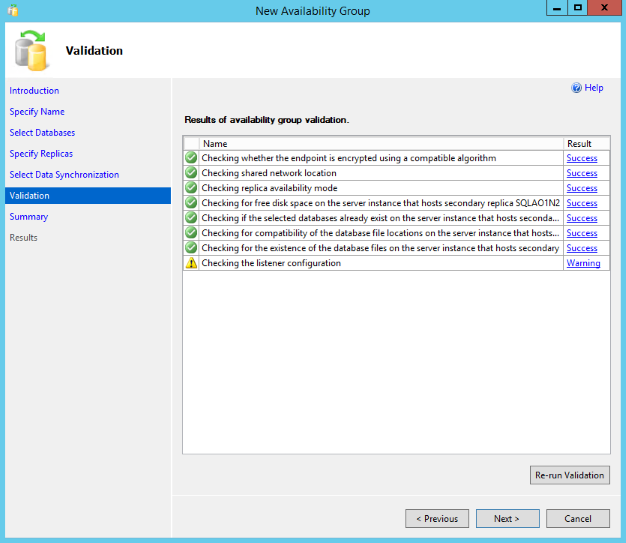
- In the Specify A Shared Network Location Accessible By All Replicas text box, enter \\SQLAO1N1\Backup, and click Next to begin validation.
At this point you should be able to use the cluster name as the database server name just like any other SQL server to access the databases. Unless you have a need to have separate listeners to segregate access to databases, there is no need to configure a listener. Skipping a separate listener also consume one less IP address on the network.


